Things to Draw How to Draw a Easy Tiger
In this drawing lesson, you will learn how to draw a tiger. Many big illustrations guide you along the way and give you a look into the details of how tiger drawings are created with graphite pencils.
Of course, such a detailed picture isn't created in five minutes. However, we are going to divide the drawing process into very few steps. You can take breaks between them if you draw along.
What you need:
- Graphite pencils of different grades: HB, B, 2B, 4B, 6B.
- A knead-eraser and a vinyl-eraser.
- A4 Paper (That's the size I used. Of course you can draw on a bigger format. A smaller one is not recommended.)
How To Draw a Tiger Step by Step
In the beginning, we map the tiger ratio. We are not concerned about the details here. An easy start is always best. Draw the outline very lightly with an HB pencil.
For better visibility I darkened the lines in the pictures below. They were actually much lighter.
Step 1: Draw a Tiger Outline the Face
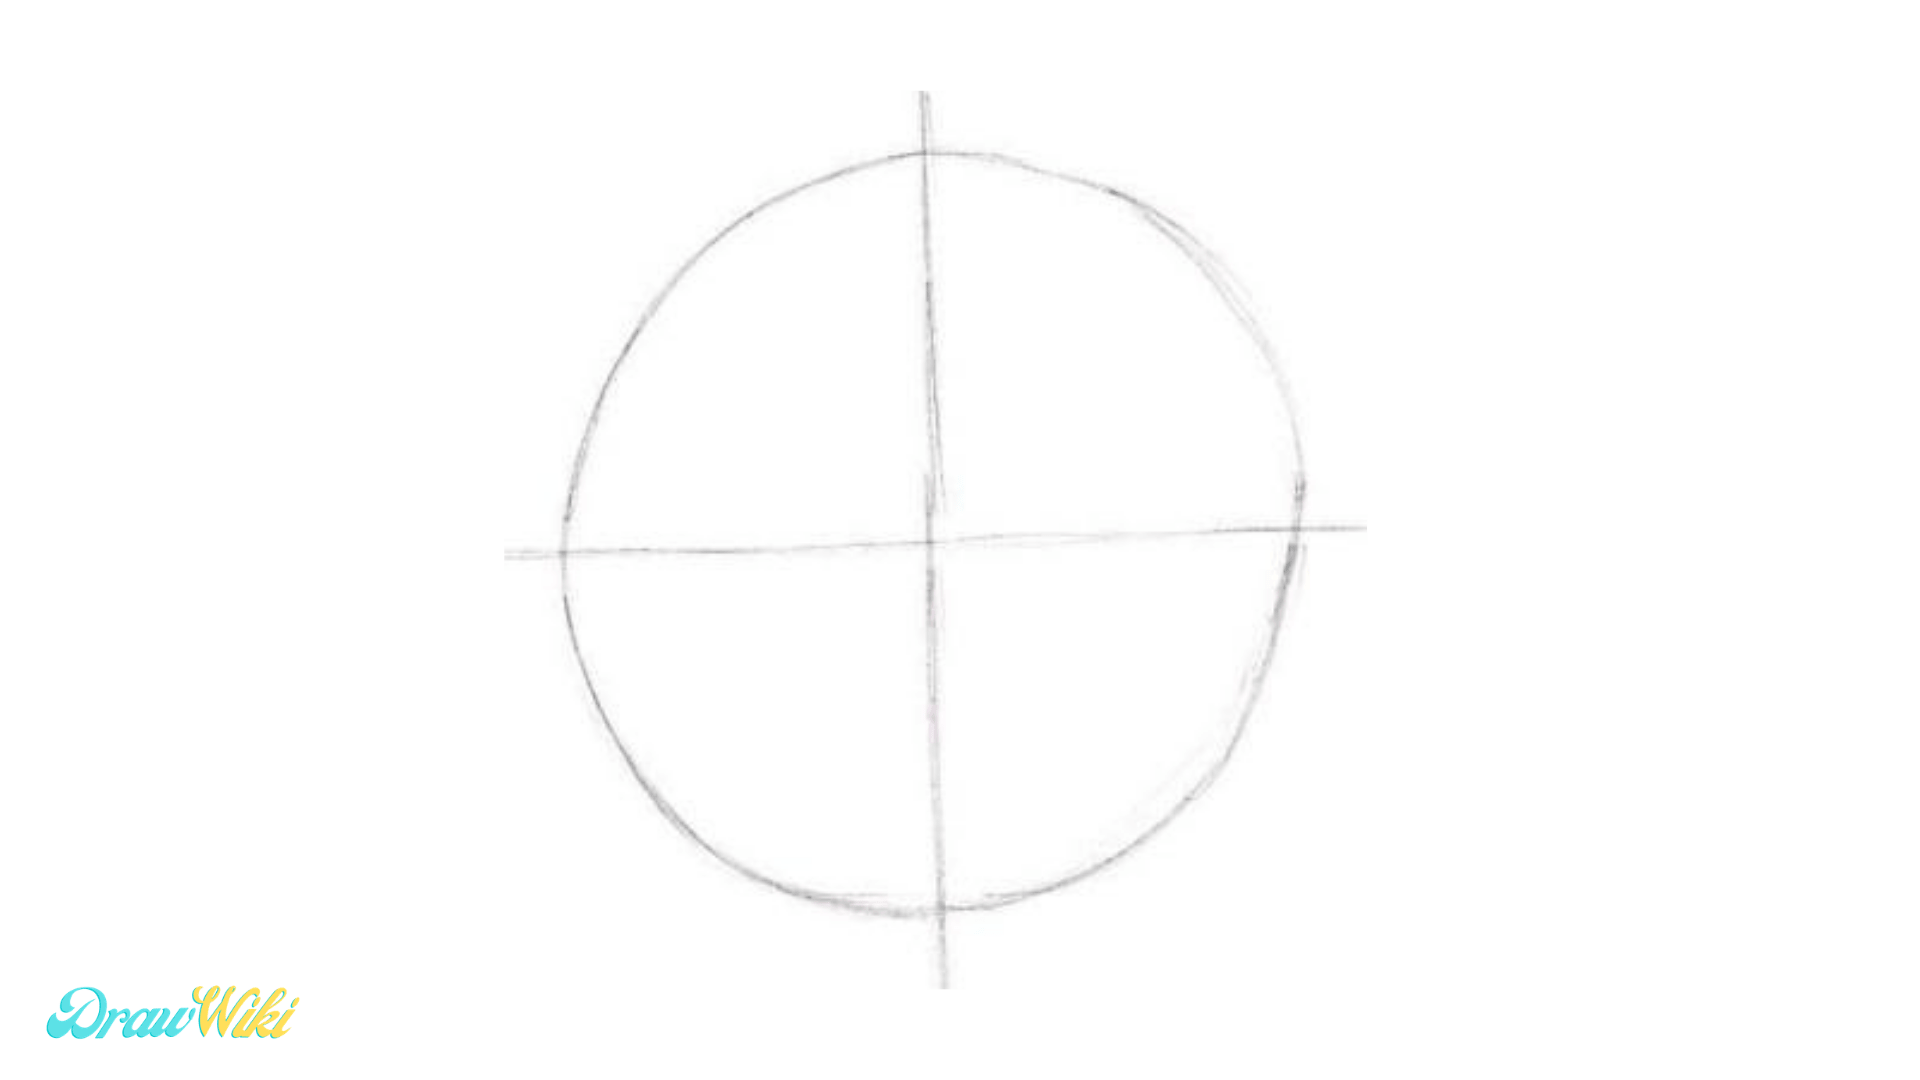
Sketch a large circle with its middle axes on your paper. My circle was about 4.5 inches (11.5 centimeters) in diameter, larger than the one shown here. If you make it that large it will be much easier for you to draw in the details. This circle is not the head itself, but will help us to construct the head.
Take care to leave enough space around it. As you can see in this picture, you will need a bit of space above and beside it and much more space below. The drawing of the whole tiger is about as high as two circles.
Step 2: Draw a Tiger Ears

Divide the top half of the circle into two again. The ears sit just on the division-line. Their diagonal height is roughly the same as a fourth of the diameter, as shown
with the blue arrows. Note that there is a slight bulge at the bottom of the ear.
Their upper end sits halfway from the dotted line to the circle's top.
Step 3: Draw a Tiger Snout
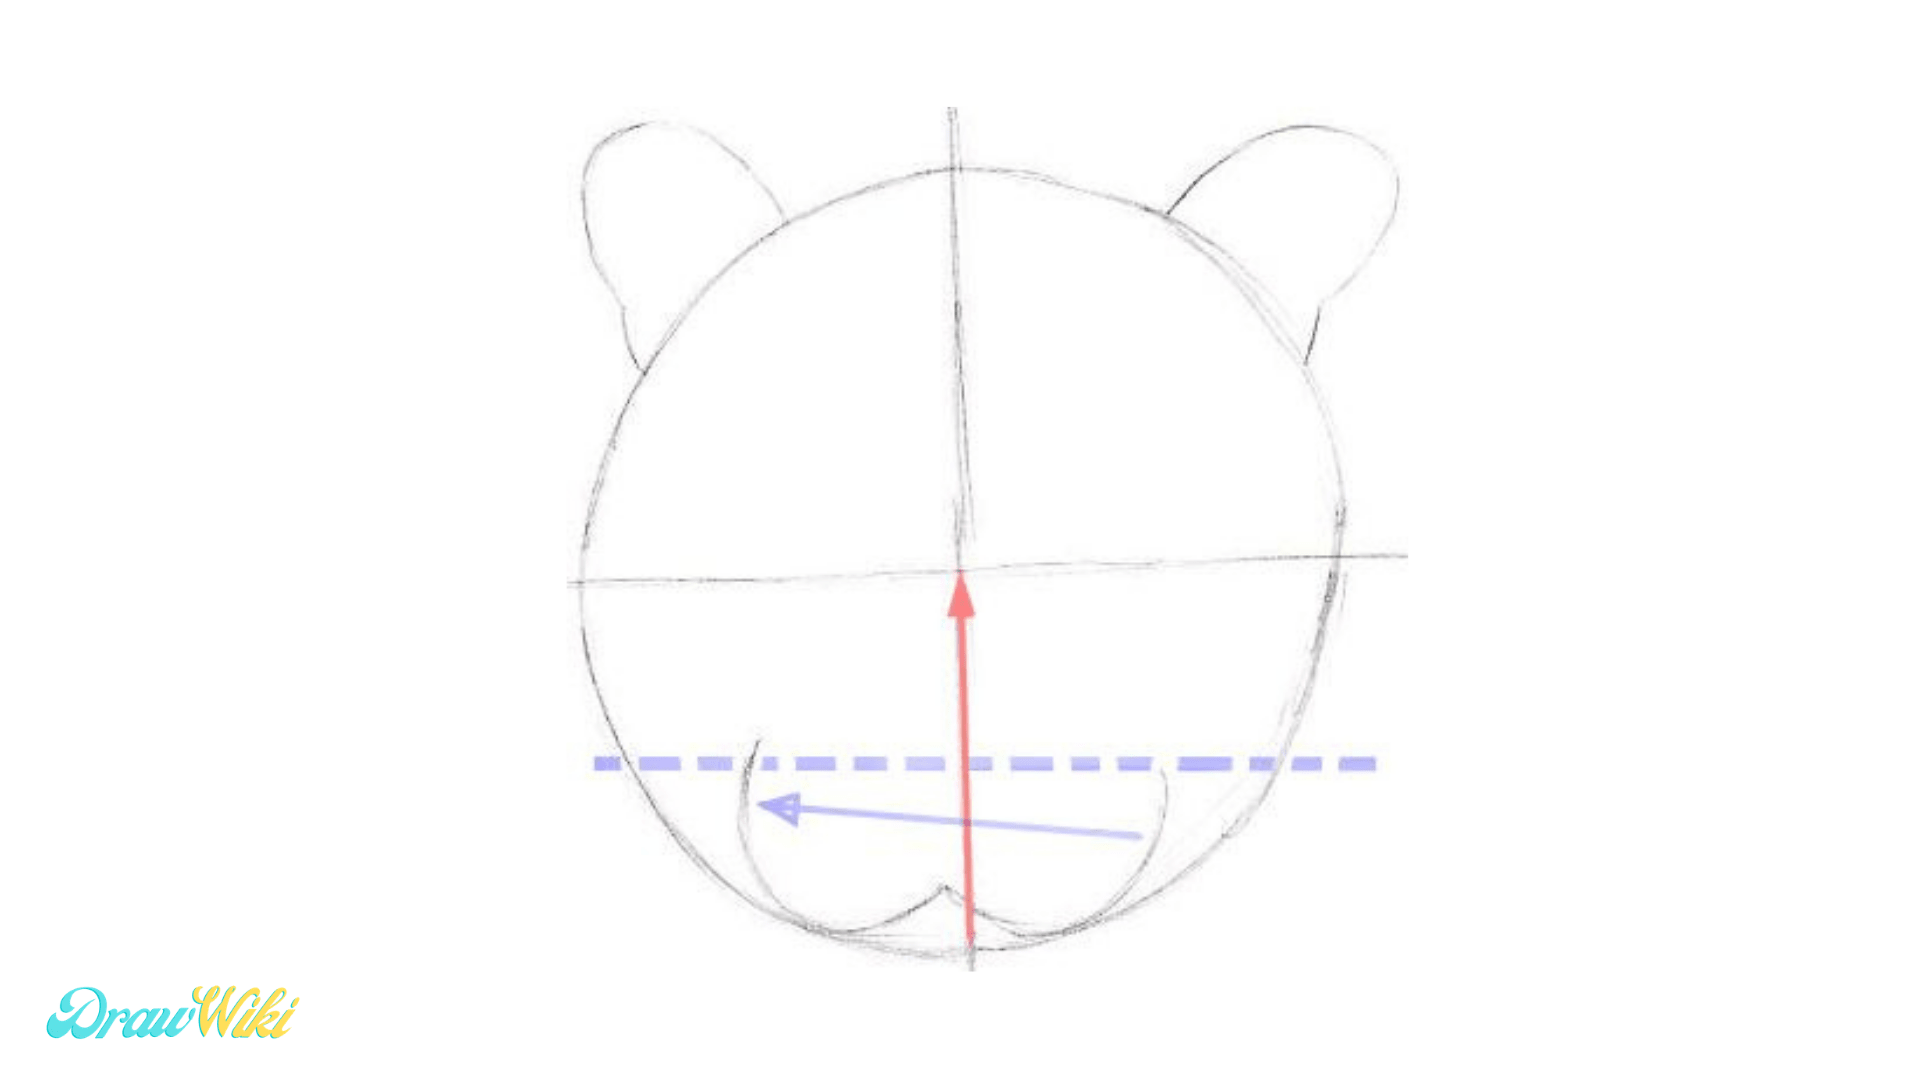
Draw in the snout into the lower quarter of the circle. Its width (blue arrow) is equal to the radius of the circle (red arrow). The shape is like around "W". In the middle of it sits a little to the left of the red arrow as the tiger tilts its head slightly.
For the same reason the left end of the "W" sits higher than the right end.
Step 4: Draw Nose & Chin

Add a triangle for the nose above the middle part of the snout. Connect it with the horizontal middle line through a couple of curves for the bridge of the nose. Then draw in two narrow lines for the lower lip and one big oval shape for the chin.
Step 5: Draw a Tiger Eyes
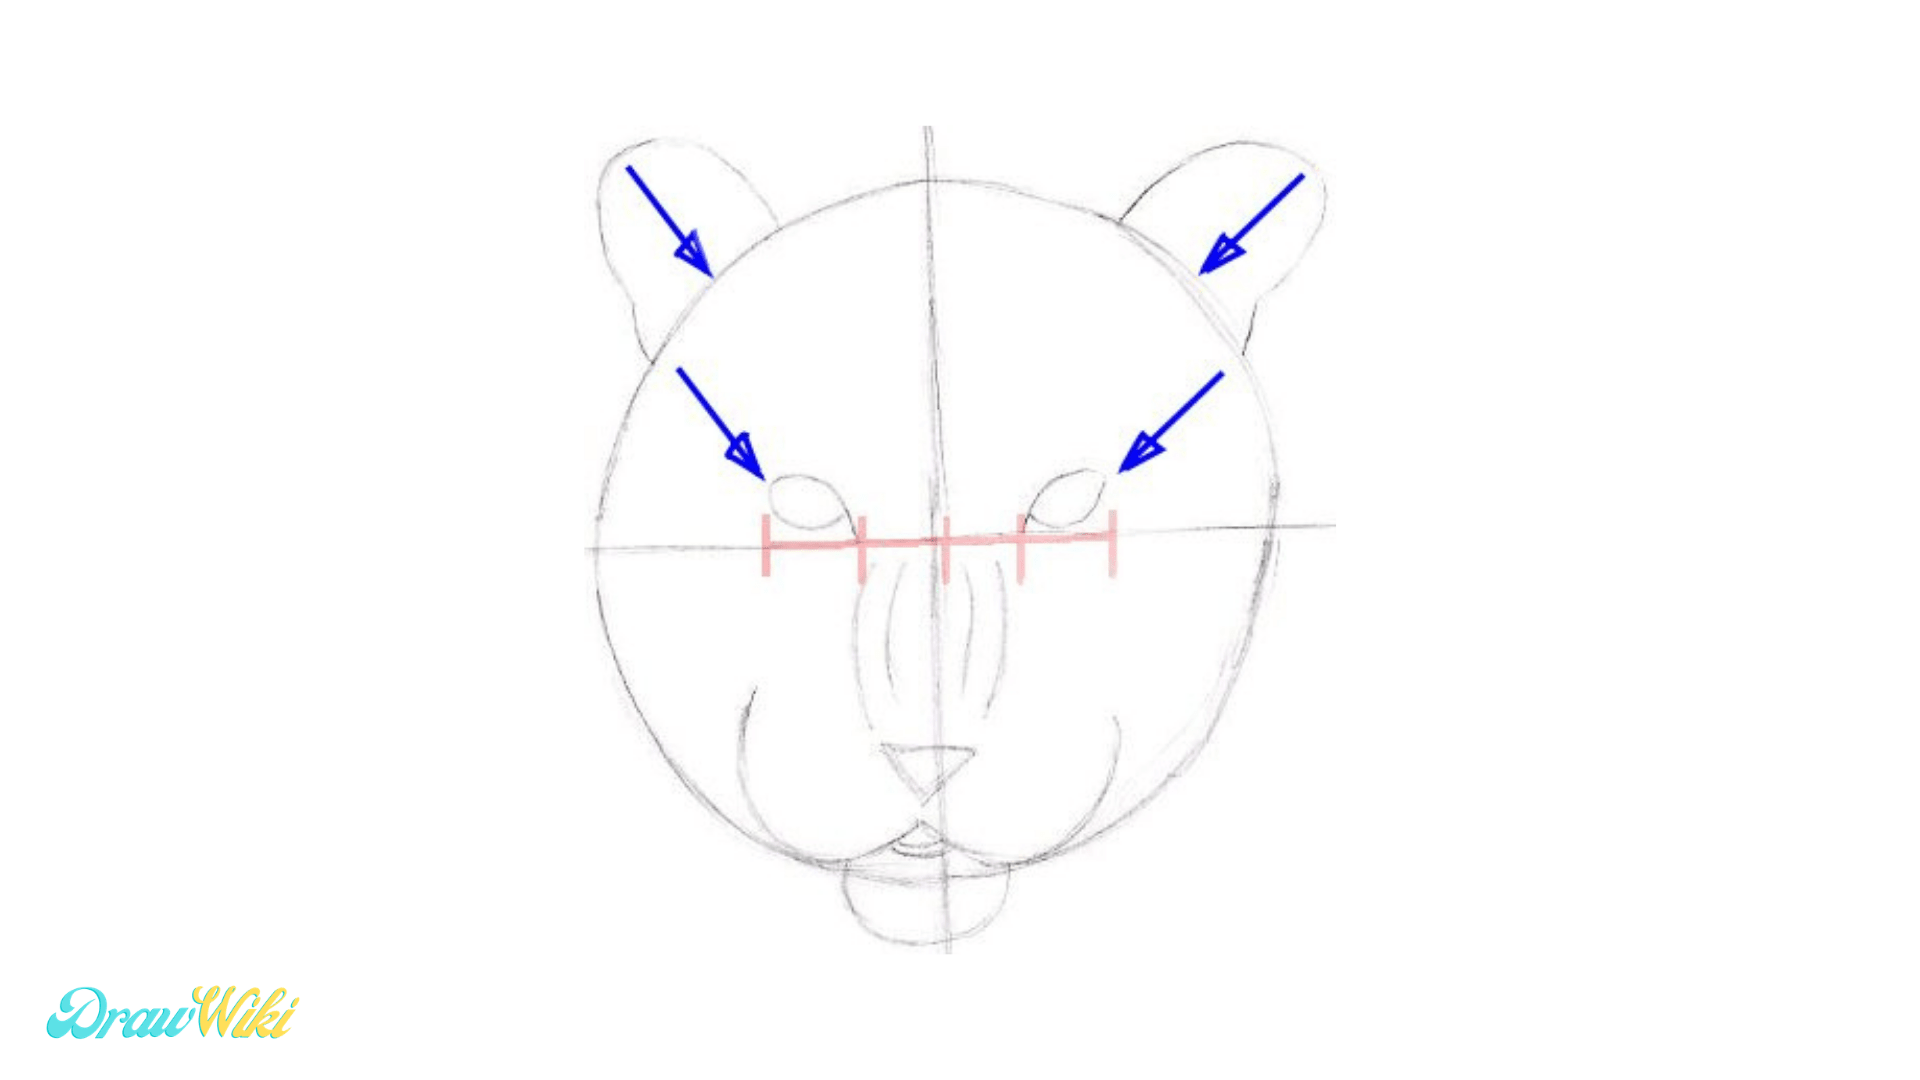
Draw the eyes just on top of the vertical middle line. The length from the ear top to the circle is exactly the same as from the lower end of the ear to the outer corner of the eye (blue arrows).
Leave so much space between the eyes that two more eyes will fit there. For the eyes, for now, give it a simple nut shape
Step 6: Draw Tiger Sideburns & Body

Draw sideburns that extend the circle on both sides. They are a bit too long here and I cut them back later. You can make them shorter than shown above. Draw in a line for the top of the head. It has moved from the left ear to the right ear. On the right side, it is a bit higher.
Then add two lines for the lower body. They arc down from the sideburns on both sides.
The left one is much closer to the face than the right one.
I also sketched in two lines that bend upwards from the snout and frame the face, but they are not important for the next steps. I just added them to make the face look more complete. Erase the circle and the two axes, because we don't need them anymore.
Step 7: Tiger Detailed Eyes Drawing
Beyond the proportional outline, we will now draw a more detailed final outline. I recommend that you make your drawn lines a bit paler with a kneaded eraser. Just roll it across the paper, so that all lines get brighter.Then the new line will stand out better. Keep drawing lightly with an HB pencil.

Start with eyes. You know where they should sit and so you can give them the final shape. The upper eyelid (blue) is a single line that bends down from the outer corner of the eye to the inner corner of the eye, which lies much lower.
The other lines are all like circles that were cut in half by the upper eyelid.
Draw two lines close together, for the lower eyelid (green), and another line deeper inside for the iris (red). Then draw the puppet centering on the Irish.
Step 8: Tiger Detailed Nose drawing
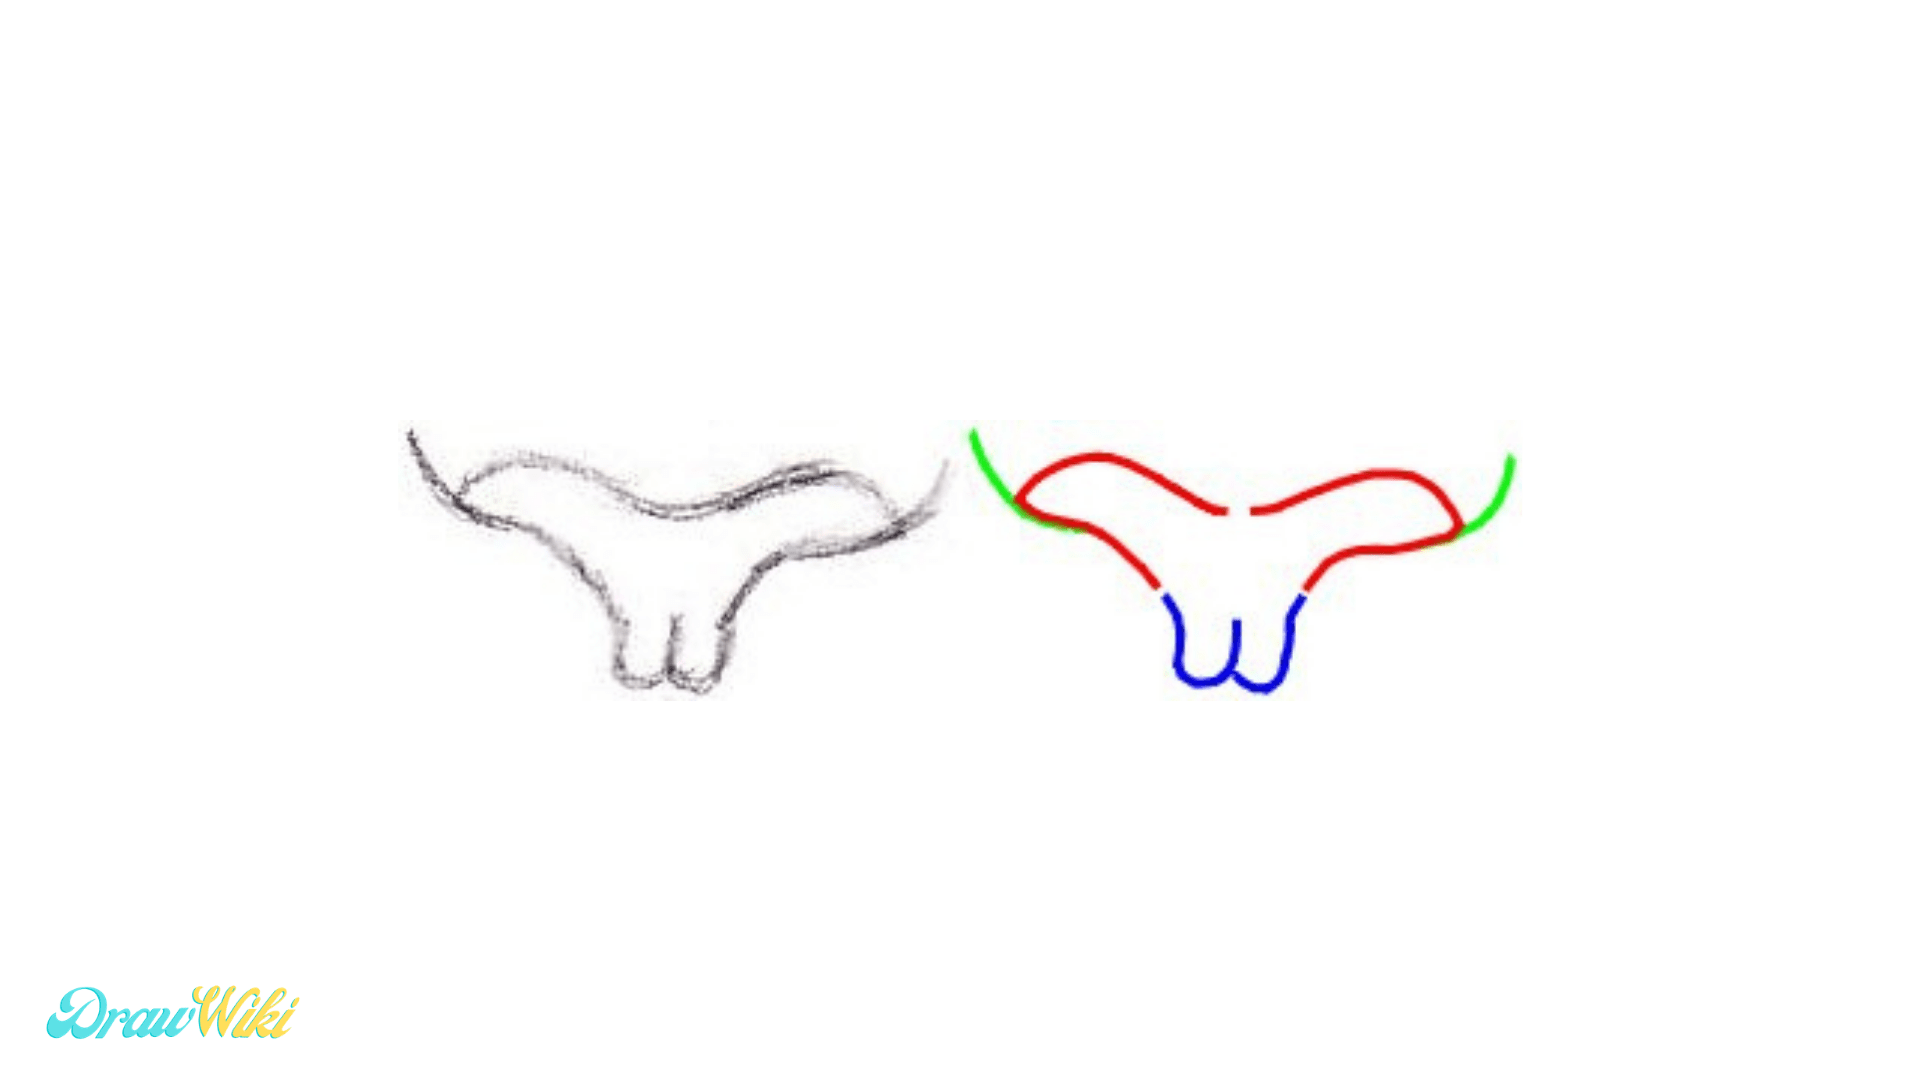
The nose is shown in color on the right, to make the shape clearer. The whole nose should be as wide as the distance from the eyes.
It has two wings at each side (red) and a shape like a rounded "W" in the middle below (blue). From the tip of each wing, a line is arcing upwards (green).
Step 9: Tiger Detailed Ears drawing

I jumped a little bit ahead of myself and textured the ears right away, before the outline for the rest of the face was finished. Here I just show the steps for the right ear.
Draw the left one in the same way.
The top row shows how bright the ears actually are. The lower row was darkened so that you can see the lines better. Take an HB pencil and draw many tiny strokes around the outline of the ear, so that its borders look furry. Make these hairs a bit darker on the left side, and the area they cover a bit broader.
Then add a bunch of long bending hairs into the left corner of the ear. Here the hairs are not the lines themselves, but the white space between the lines.
Take a softer pencil (B) and add a shadow around the hairs.
At the upper left and between the hairs the shadow should be darkest.
Let it blend into brighter values the more you go to the lower right.
Step 10: Tiger Detailed Snout Drawing

Draw many fine hairs around the snout and chin. At the chin the hairs are longer and straight. At the snout they are rather short and slightly curved sideward.
Add quite a few whiskers afterward. Let some start from the very edge of the snout and some more from inside. The whiskers at the top or closest to the chin are rather short.
The whiskers in the middle are longer.
Step 11: Draw White Fur Pattern
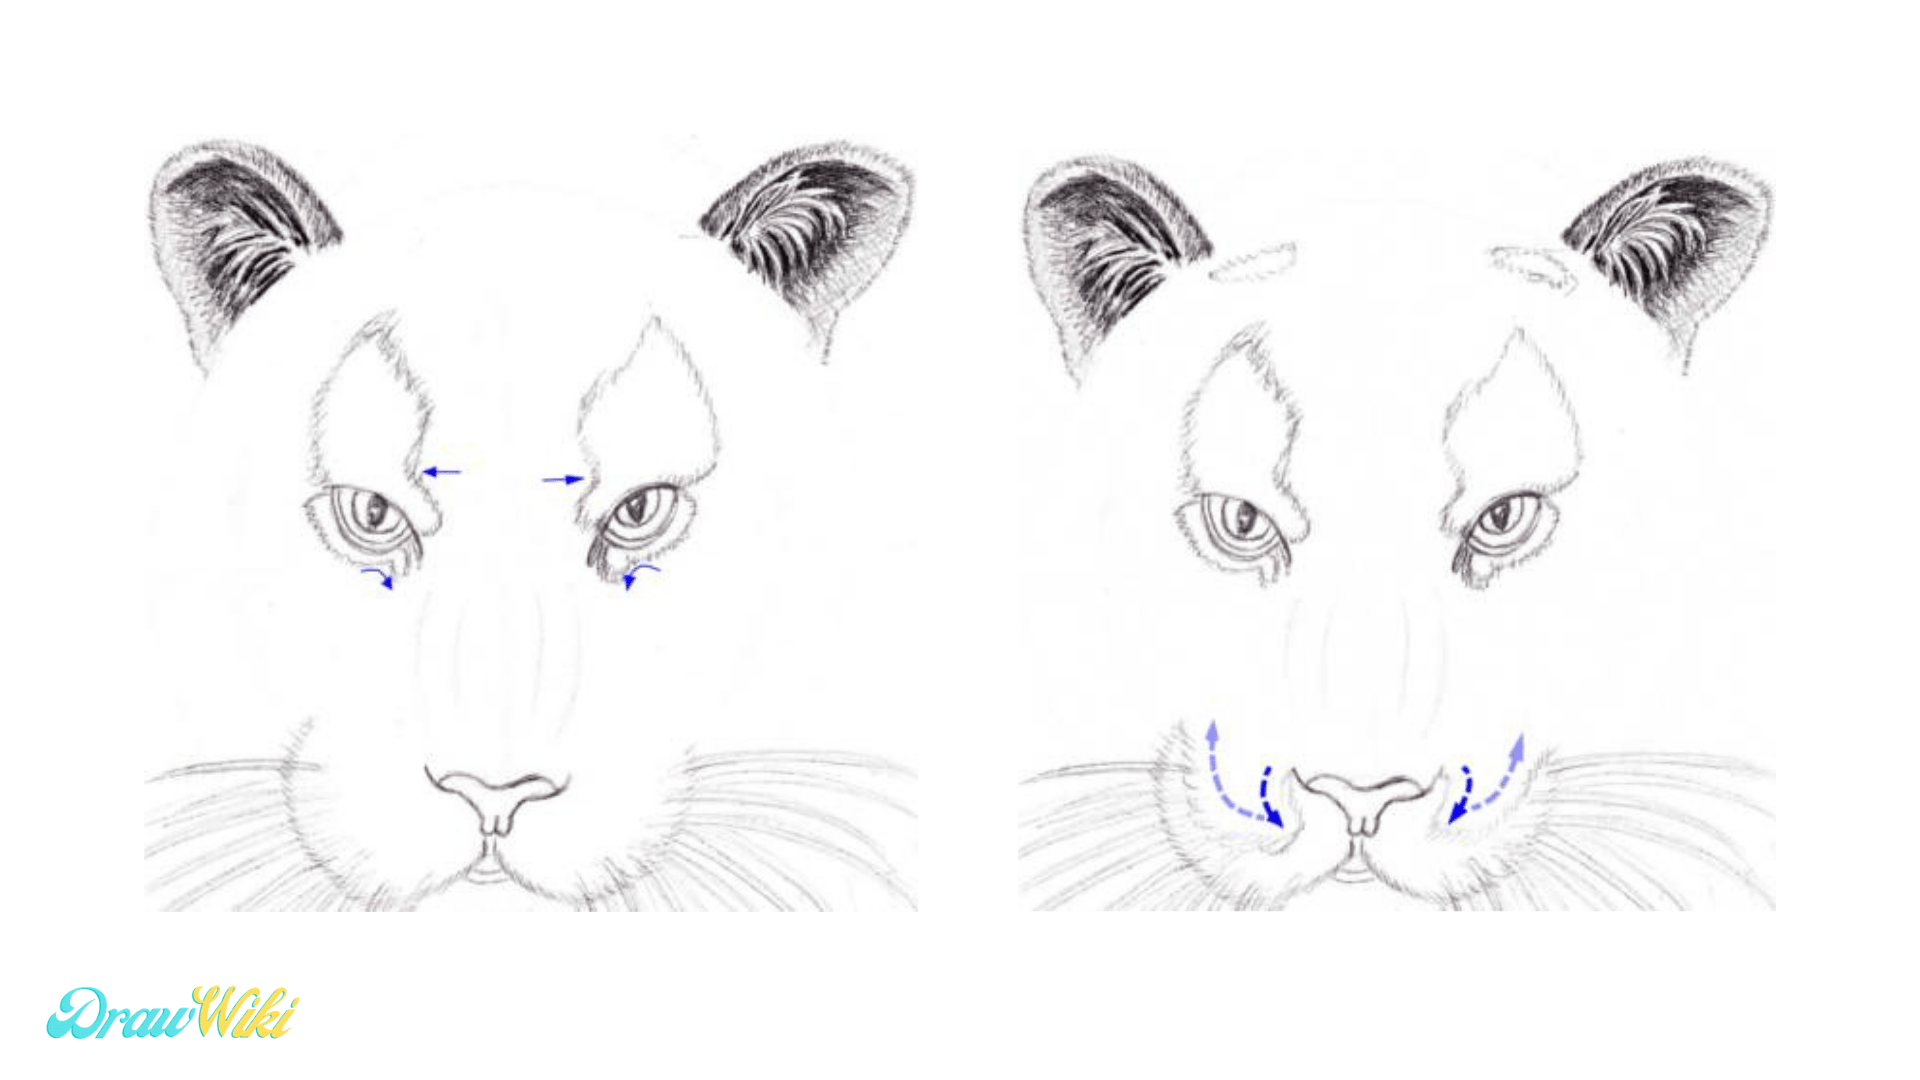
The following shapes will be the white specks in the tiger's face. I outlined them with zigzag lines to distinguish them from the black stripes, which are drawn with straight lines later. Draw two large specks above the eyes. The bulges that are marked with arrows are important for the fierce expression of the face.
Below each eye, there is a thin row of white fur, which arcs down a bit at the inner corner of the eye.
Draw two more white spots close to the ears and a rim around the snout. The rim starts at the outer edge of the lines beside the nose. It arcs inwards a little, then changes its direction and goes up to the side of the snout in a long curve.
Step 12: Draw Black Fur Pattern

Here I stopped using zigzag lines so that you can still tell the difference between black and white fur-pattern. The newly added patterns in each step are shown in red, for better visibility.
Draw in the following for each eye. two little shapes into the white area above the eye. A big shape that starts at the outer corner of the eye. A thin stripe below the white fur under the eye. On the left side, the last two are connected.
Fill in the forehead with several thin and uneven stripes. They start close to the white fur above the eyes and point diagonally upwards to the middle of the skull. Sprinkle a few dots below them.

The green line that runs up the skull in this picture is there to show the middle of the fur pattern. Note how it bends slightly to the right at the top. All stripes that run towards it end before they touch this middle line.
There are only two little stripes that lie on it. Draw in five rows of stripes in total.
The upper three, between the ears, are close together, while the lower two have a bit more space between them.
Draw in two stripes that start thin under the ears and go outwards to the sideburns.
There they get broad and arc down in a big curve.
Add two more stripes, which start close to the pattern at the outer corner of the eye. On the left side, it is actually extending that pattern. They curve down to the beginning of the snout and send out a couple of spikes that point towards the eyes.
Fill in the area below the eyes with some additional spikes that aren't connected to any bigger pattern. But the snout should largely stay free of them. They are only at the very margin. That's all for the face. Just throw in a couple of stripes into the body and the whole fur-pattern is finished.
On the left side, I added an additional line at the side of the body (shown in purple). This is for the hind part of the tiger's body, which is slightly visible. And with that your whole outline of the tiger is complete.
Step 13: Shading the Eyes
Now comes the part that's most fun in my opinion. We are going to bring the tiger alive through adding shading and fur texture to his body. For this you'll need pencils of different grades now. I always mention which pencils I used for the different parts.
For this, you'll need pencils of different grades now. I always mention which pencils I used for the different parts.
Before you start filling in the tiger, you may consider rolling your knead-eraser over the whole outline once more(except ears, since they are finished already).
The lines should be so pale that you won't see them in the finished picture.

Fill in the pupil with a 6B pencil, but leave a white highlight inside. Then take a 4B pencil to shade the eyelids:
Draw the borders of the lower eyelid with a sharp pencil and with a lot of pressure, so that they become very dark (blue arrows). Then fill in the space between the black borders with a lighter grey value. This will give a neat 3D effect to the eyelid.
You can see that it is bulging out.
Draw one thick black line along the upper eyelid. Then add many little curved lines on top of it. These are no eyelashes. Instead, these black lines are parts of the eyelid, which are visible between white strands of fur.The later are the white spaces between the black lines.
Finally draw in two thin shapes, which bend gently downwards, at the inner corner of the eyes. Use an HB pencil to fill in the iris with a light grey value. Then take a pointy B pencil to draw thin lines all around the pupil. Let them point towards the eye center (blue arrows).
Step 14: Shading of the Nose
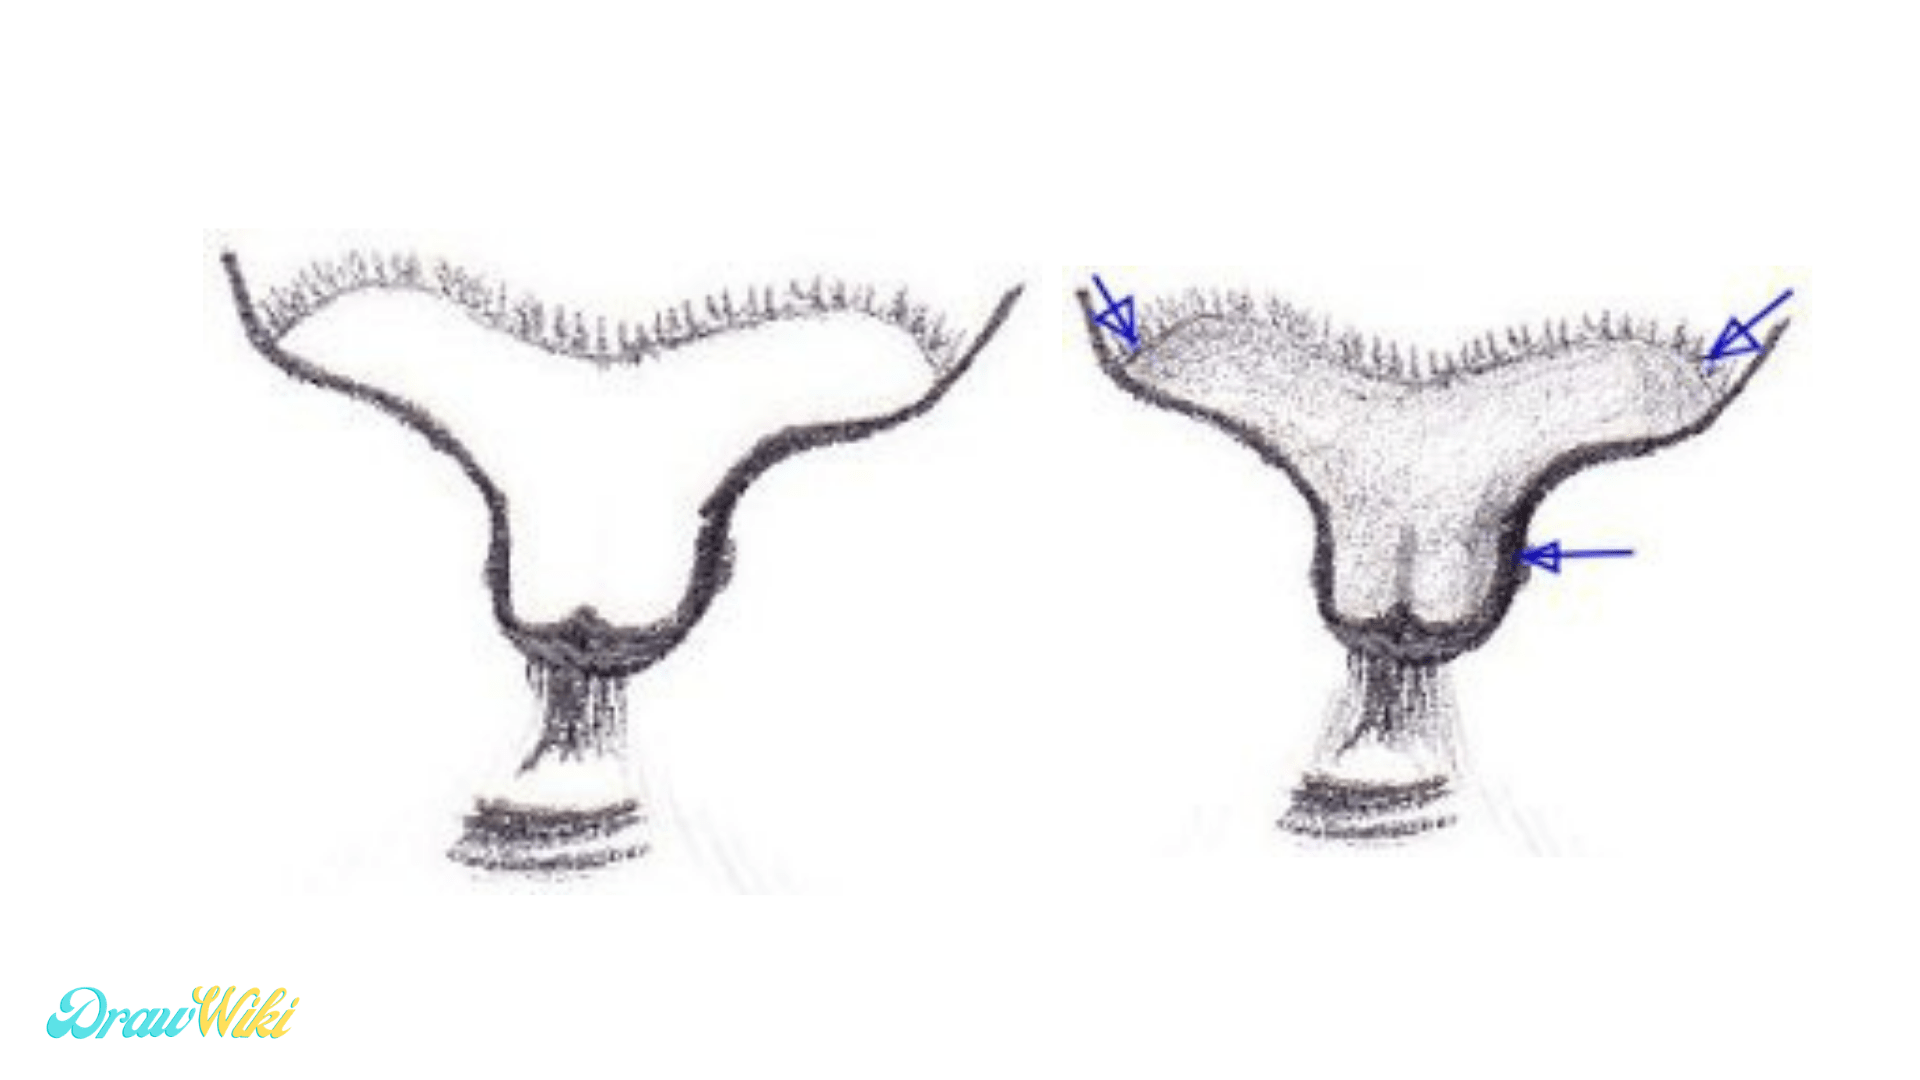
Draw a black line under the nose with a 4B pencil. It goes all the way up to the two little arcs at the side of the nose. Add a couple of black hairs below the nose, and shade the edges of the lip. Then take an HB pencil and draw many little hairs along the upper rim of the nose.
Shade the nose with a B pencil. First, fill it in completely with a very light grey.
Then darken it at the edges and let the dark values blend smoothly into the brighter ones in the middle. The blue arrows point out the darkest areas.
In the middle, the nose is the brightest.
Step 15: Draw a Tiger Head Fur Texture

Now we start drawing the fur. It is important that you keep your pencils very sharp here.
The lines you draw should be very thin and look like hairs.
Fill in all the stripes with black lines, using a 4B pencil. Don't draw them in a zigzag fashion, but set many single lines next to each other. Vary length and thickness of the lines slightly, so that they don't look too ordered. The direction is important. On the forehead, the hairs are pointing upwards. Around the eyes, they are always bending away from the eye.
At the sideburns, they point slightly downwards. Now take an HB pencil and fill in the upper part of the face. Let the lines point in the same direction as the black ones around them.
Overall they should be very short and dense. Yet as you see there is a bit of white still visible between them and that's okay. Take care to leave the areas for white fur empty (around the eyes and at the ears), as well as the lower part of the sideburns (as indicated by the red lines). At the upper parts of the sideburns, the lines should be much longer than on the forehead.
Step 16: Shading & Shadows
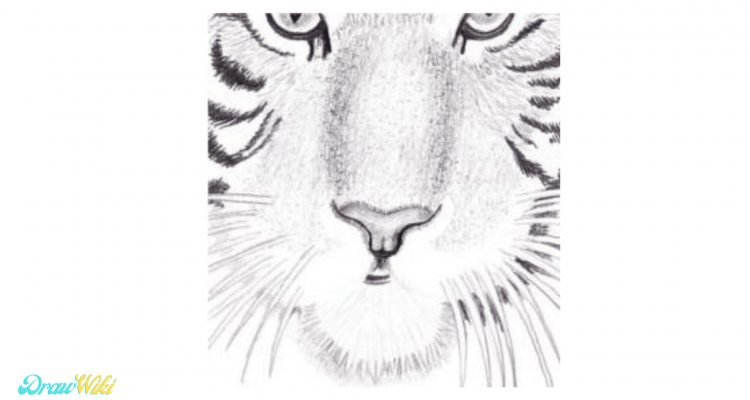
The fur on a tiger's nose is so short and dense that you usually can't distinguish any single hair. So we take a different approach here.
Take your HB pencil and shade the whole area above the snout and only leave the white outline at the lower rim empty. Make the edges of the bridge of the nose darker.
Then sprinkle in thousand little dots all over the shaded surface with a B pencil.
Add a shadow under the thick black line below the nose with an HB pencil. Also, draw a shadow below the chin and around the snout. Use a 2B pencil for this one. Be careful to not overdraw the hairs at the chin or the whiskers. The shadow should be visible between them.
Under the chin and on the left side of the snout the shadow can be as dark as on the right side. Here it looks brighter, but I darkened it later.
Step 17: Draw Tiger Shadows & Black Specks

Keep your 2B pencil and add several curved rows of dots on each side of the snout.
Scatter them above and between the whiskers. Also, draw in a couple of dark lines on the chin and make a few tiny dots at the sides of the bridge of the nose.
Now the tiger's face is complete and in a few steps we'll finish his body.
Step 18: Draw Tiger Body Texture

First fill in the stripes on the body with many little black strokes again, using a 4B pencil. Take a B pencil and shade the sides of the front body. Then fill in the hind body in a darker tone.
Step 19: Tiger drawing Final Touch
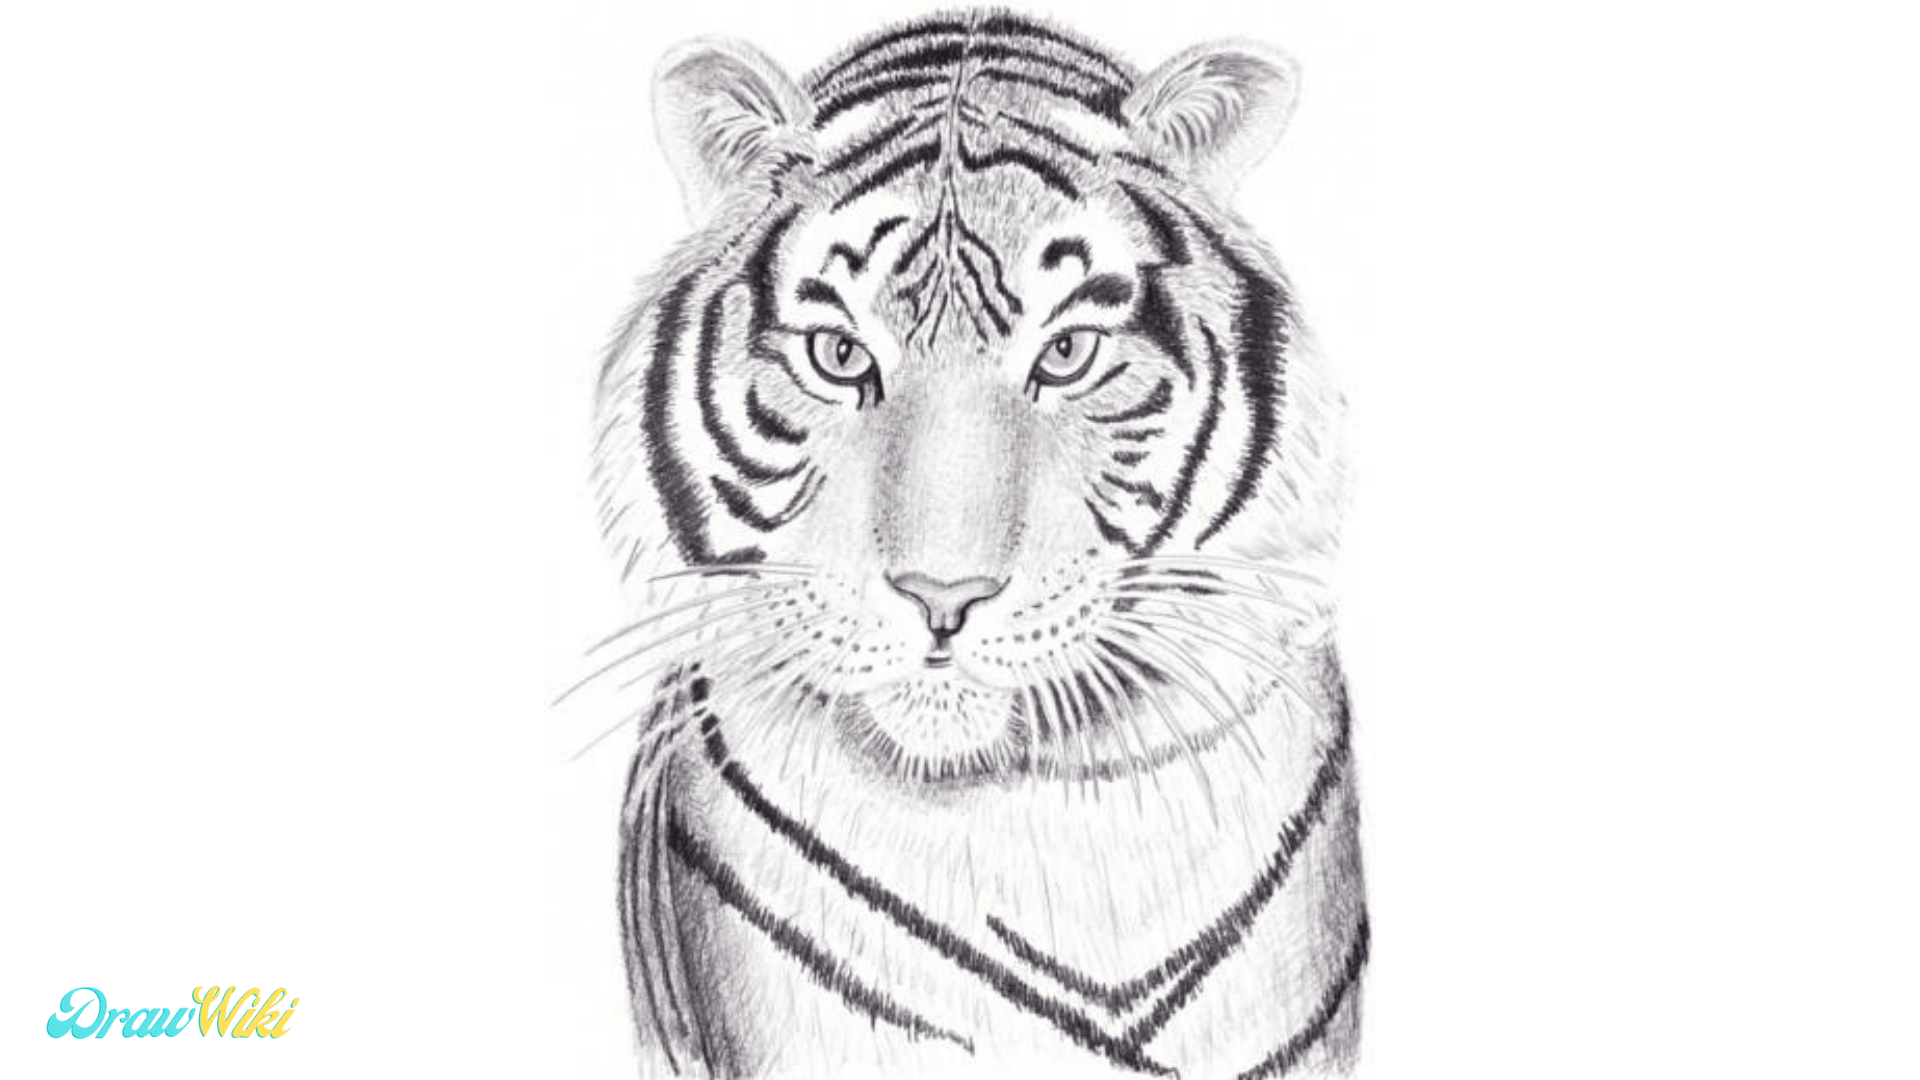
In this picture there actually changed a lot from the last, though it may not be obvious immediately.
Darken the sides of the front body a bit more with a B pencil, so that they stand out stronger (if this is necessary in your picture). Then take an HB pencil to draw in many long lines into the white for of the front body. Also add a couple of thin black stripes to the hind body with a 4B pencil.
Switch to your HB again, and now turn to the face once more. Quickly work over all the areas in the upper face. Just throw in many darker lines among the brighter ones, by pressing the pencil down stronger than before. This gives much more depth to the texture.
Also draw several lines into the lower white part of the sideburns, so that they are clearly outlined and filled, but still, look white. These lines should be rather long.
Conclusion
So your tiger drawing has taken shape! We went all the way from a crude outline to a full textured predator cat. Learn how to draw a tiger step by step Please comment to us about our drawing. Quite a journey! See you soon for another one.
In this drawing we used list of tools in below
- Graphite pencils of different grades: HB, B, 2B, 4B, 6B.
- A knead-eraser and a vinyl-eraser.
- A4 Paper (That's the size I used. Of course you can draw on a bigger format. A smaller one is not recommended.)
Here I am showing 19 easy to tiger drawing. Beginners also can draw. It's helpful for everyone.
Here 19 steps to complete this drawing. We trying to as easy as possible.
More Drawing Tutorials :
- How to Draw Yoshi
- Draw a Couch Step by Step Guides for Grownup
- How to draw a microscope step by step beginners guide
- Draw an Eagle Step by Step Beginner Guides
- How to Draw a Rooster With 11+ Easy Steps
quirionunfinamess.blogspot.com
Source: https://drawwiki.com/how-to-draw-a-tiger/
0 Response to "Things to Draw How to Draw a Easy Tiger"
Post a Comment